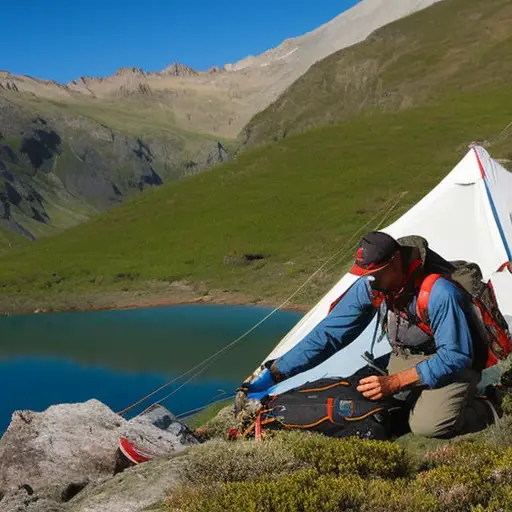
Imagine you’re on a rugged adventure in the wilderness, miles away from civilization, when disaster strikes – your gear breaks. In that moment, the importance of knowing how to repair your equipment becomes crystal clear.
Whether it’s a torn fabric, a broken zipper, or a bent pole, having the skills and tools to fix these issues can be a game-changer.
In this article, we will explore essential tips and techniques for repairing gear in the wild, ensuring you can continue your expedition with confidence and peace of mind.
Essential Tools for Gear Repair
When repairing gear in the wild, having essential tools is imperative for efficient and effective repairs. Whether you are in the wilderness or on an outdoor adventure, having the right tools for gear repair can make all the difference. These tools not only aid in fixing broken equipment but also enable you to quickly get back on track and continue your journey.
One of the most important tools for gear repair is a multi-tool. A multi-tool typically includes pliers, scissors, a knife, and other essential tools, all combined into one compact device. This versatile tool allows you to tackle a wide range of repair tasks, from tightening screws to cutting through ropes or straps.
Additionally, a sewing kit is another essential tool for repairing torn or ripped fabric. It should include needles, thread, and a small pair of scissors. This kit enables you to mend clothing, tents, or sleeping bags, ensuring that they remain functional and durable throughout your outdoor adventure.
Having these tools for gear repair is essential, as they provide the means to fix equipment on the go. With the right tools at your disposal, you can swiftly address any issues that may arise and continue to enjoy your outdoor experience.
Now, let’s delve into the techniques for repairing torn or ripped fabric.
Repairing Torn or Ripped Fabric
When out in the wild, it is not uncommon for gear to get torn or ripped.
In such situations, it is important to have the knowledge and skills to repair the damaged fabric. This can be done through patching torn fabric or sewing ripped seams.
Patching Torn Fabric
To effectively repair torn or ripped fabric in the wilderness, utilize a suitable patching technique using a high-quality adhesive. When patching torn fabric, consider the following:
- Stitching techniques for durable repairs:
- Reinforce the torn area with a zigzag stitch to prevent further tearing.
- Use a lock stitch or backstitch for added strength and durability.
Choosing the right fabric patches for different gear materials:
- For lightweight fabrics, opt for patches made from nylon or polyester.
- For heavy-duty fabrics, such as canvas or denim, use patches made from similar materials.
Sewing Ripped Seams
To effectively repair torn or ripped fabric in the wilderness, it is important to master the skill of sewing ripped seams using proper techniques and tools.
Sewing techniques for repairing torn or ripped fabric involve specific stitch patterns that ensure a strong and durable repair. One commonly used stitch pattern is the backstitch, which involves taking small stitches forward and then returning the needle back through the previous stitch. This creates a secure and reinforced seam.
Another effective stitch pattern is the whipstitch, where the needle passes through the fabric in a diagonal motion, creating a crisscross pattern that prevents further tearing.
When sewing ripped seams, it is crucial to use a sturdy needle and strong thread to withstand the stress of outdoor activities.
Fixing Broken Zippers
One effective technique for repairing broken zippers in the wild is to use a sturdy needle and thread. This method allows you to fix a zipper quickly and easily, ensuring your gear remains functional during your outdoor adventures.
However, before attempting any repairs, it is important to troubleshoot the zipper malfunction to identify the root cause of the problem. This can include examining the teeth for any obstructions or misalignment, checking the slider for damage, or inspecting the fabric surrounding the zipper for tears or fraying.
Once the issue has been identified, you can proceed with the repair using the following steps:
- Thread the needle with a strong, durable thread that matches the color of the existing stitching.
- Start by sewing over the area where the zipper is broken or detached, reinforcing the fabric to provide a sturdy base.
- Carefully align the teeth or fabric edges, and stitch them together using a backstitch or a whipstitch, ensuring the thread securely holds the pieces in place.
- Continue stitching along the length of the zipper, making sure to maintain an even tension and spacing between stitches.
In some cases, zipper repairs may not be possible due to extensive damage or lack of suitable materials. In these situations, it is important to have alternative fastening options available, such as safety pins, hook and loop fasteners, or cord locks, to secure your gear and ensure it remains functional in the wild.
Patching Holes in Gear
After successfully fixing broken zippers in the wild, it is important to address the issue of patching holes in gear to ensure its continued functionality and durability. When it comes to DIY gear repair techniques, using adhesive patches can be an effective and quick solution. Adhesive patches are designed to provide a strong and durable bond, making them suitable for patching small to medium-sized holes in gear such as tents, sleeping bags, or backpacks.
To patch a hole using adhesive patches, start by cleaning the area around the hole with a mild detergent and water. Make sure the surface is dry before proceeding. Cut the adhesive patch into a size slightly larger than the hole, ensuring it adequately covers the damaged area. Peel off the backing of the patch and carefully place it over the hole, applying pressure to ensure proper adhesion. Smooth out any air bubbles or wrinkles with your fingers.
It is important to note that adhesive patches are designed for temporary fixes and may not provide a permanent solution. Therefore, it is recommended to seek professional repair or replacement for larger or more serious damage. However, in emergency situations or when professional help is not available, adhesive patches can be a reliable and convenient option for patching holes in gear.
Repairing Bent or Broken Poles
When faced with the challenge of repairing bent or broken poles in the wilderness, a reliable and effective solution is to utilize pole splints. These splints can help straighten bent poles and reinforce weakened pole sections, ensuring that your gear remains functional and durable.
Here are some important tips and techniques for repairing bent or broken poles:
-
Assess the damage: Before attempting any repairs, carefully examine the extent of the damage to the pole. Determine if it is bent, cracked, or completely broken.
-
Straightening bent poles: To straighten a bent pole, gently apply pressure in the opposite direction of the bend. Use caution and apply gradual force to avoid further damage.
-
Using pole splints: For broken or severely weakened pole sections, pole splints can be used to reinforce the damaged area. Place the splint along the broken section and secure it tightly using tape or cordage.
-
Improvisation: In situations where pole splints are not available, you can use natural materials like sturdy branches or cordage to create makeshift splints.
Securing Loose or Frayed Straps
To ensure the integrity of your gear, it is crucial to address the issue of securing loose or frayed straps. When straps become loose or frayed, they can compromise the stability and functionality of your equipment, increasing the risk of accidents or damage. Securing knots are an effective way to prevent strap damage and ensure that your gear remains securely fastened.
To properly secure loose or frayed straps, follow these steps:
- Identify the loose or frayed strap.
- Inspect the strap for any signs of damage or wear.
- If the strap is frayed, trim any loose threads to prevent further unraveling.
- Use a securing knot to fasten the strap tightly. Refer to the table below for some commonly used securing knots.
| Knot | Purpose |
|---|---|
| Square Knot | Secure two straps of equal width together. |
| Bowline Knot | Create a secure loop at the end of a strap. |
| Clove Hitch | Fasten a strap to a post or pole. |
| Truckers Hitch | Create a tight and adjustable strap tension. |
| Figure Eight Knot | Prevent the end of a strap from slipping through a buckle. |
Frequently Asked Questions
Can I Use Duct Tape as a Temporary Fix for Torn or Ripped Fabric?
Yes, duct tape can be used as a temporary fix for torn or ripped fabric. However, it is not a long-term solution. Alternatives for repairing torn or ripped fabric without duct tape include sewing, patching, or using fabric glue.
How Can I Repair a Zipper That Keeps Getting Stuck?
Zipper maintenance is crucial for ensuring smooth functionality and preventing it from getting stuck. Troubleshooting zippers involves cleaning the teeth, lubricating with wax or graphite, and replacing damaged components if necessary.
What Is the Best Way to Patch a Hole in a Tent?
The best way to patch a hole in a tent is by using tent patching techniques that are specifically designed for repairing gear in the wild. These techniques ensure a durable and reliable repair.
Is It Possible to Repair a Bent Tent Pole or Do I Need to Replace It?
Repairing a bent tent pole is possible using various techniques such as straightening, splinting, or heat-shrinking. However, the effectiveness of these methods depends on the extent of the damage. Replacement options should be considered if the pole is severely bent or compromised.
How Can I Secure Loose or Frayed Straps Without Sewing?
There are alternative methods for securing loose or frayed straps without sewing. One option is to use adhesive or heat to fix torn or ripped fabric, providing a quick and efficient solution.
Conclusion
In the wild, gear repair is a crucial skill for outdoor enthusiasts. By equipping oneself with essential tools and learning simple techniques, one can mend torn fabric, fix broken zippers, patch holes, repair poles, and secure loose straps.
Just like a skilled surgeon mending a wounded body, these repairs revive our gear, enabling us to continue our adventures with confidence and resilience.
Embracing the art of gear repair not only saves us money but also fosters a deeper connection with our equipment and the natural world.