
In the arid expanse of the desert, where water is as scarce as a mirage, the sun emerges as a vital ally. Harnessing its power, a DIY solar still becomes a beacon of hope, capturing and purifying the life-giving liquid that sustains us.
This article delves into the technical intricacies of constructing such a device, from selecting the ideal location to assembling the necessary materials. Join us as we unveil the precise steps to create a reliable source of potable water through the art of solar distillation.
Required Materials
To construct a DIY solar still for water collection, it is essential to gather the required materials. By choosing the right location and employing effective water purification techniques, one can ensure a successful and efficient water collection system.
The first step in constructing a DIY solar still is selecting the appropriate location. It is crucial to choose a spot that receives ample sunlight throughout the day. Ideally, the location should be flat and unobstructed to maximize solar exposure. Additionally, the area should be close to a water source to facilitate the collection process.
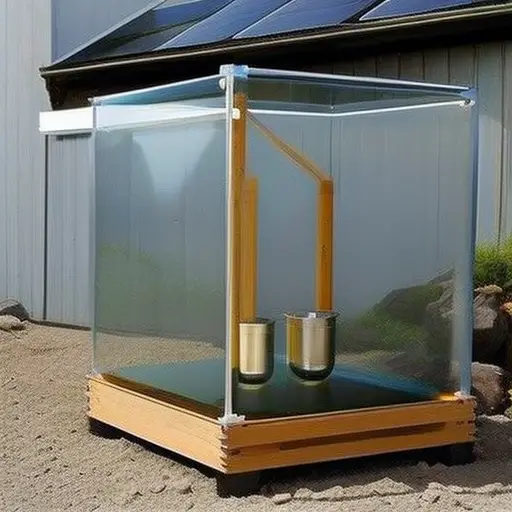
In terms of materials, the key components for a DIY solar still include a container or basin to hold the water, a transparent cover or sheet to create a greenhouse effect, and a collection vessel to collect the purified water. Other necessary materials include adhesive tape, a thermometer, and a small tube or pipe for condensation and water collection.
Furthermore, it is crucial to consider water purification techniques to ensure the collected water is safe for consumption. Adding a layer of activated charcoal or sand to the bottom of the container can help filter out impurities. Additionally, including a solar disinfection step by exposing the collected water to direct sunlight can help kill any remaining pathogens.
Choosing the Location
The selection of an appropriate location is crucial when constructing a DIY solar still for water collection. To ensure optimal efficiency and maximum water production, it is necessary to carefully choose the right spot for the solar still. Several environmental considerations should be taken into account during this process.
Firstly, it is essential to select a location that receives ample sunlight throughout the day. The solar still relies on the energy from the sun to heat the water and facilitate the evaporation process. Therefore, it is recommended to place the solar still in an area that is free from obstructions such as tall buildings or trees, which could potentially cast shadows and hinder the collection of solar energy.
Additionally, the location should be relatively flat and level to ensure the even distribution of water within the still. This will promote better heat absorption and prevent any pooling or uneven evaporation. Moreover, it is advisable to position the solar still in an area that is not prone to flooding or excessive rainfall, as this could negatively impact the water collection process.
Building the Solar Still Frame
One crucial step in constructing a DIY solar still for water collection is assembling the frame. The solar still frame design plays a significant role in ensuring the stability and functionality of the entire system. A well-designed frame provides the necessary support and structure for the solar still components.
When building the solar still frame, it is important to consider factors such as durability, ease of assembly, and material availability. The frame should be constructed using sturdy materials like aluminum or steel to ensure long-lasting stability. Additionally, the frame should be designed in such a way that it allows for easy assembly and disassembly, as well as transportation if needed.
To further illustrate the different aspects of solar still frame design, consider the following table:
| Aspect | Considerations |
|---|---|
| Material | Sturdy and durable, e.g., aluminum or steel |
| Size | Compatible with the size of the still system |
| Ease of assembly | Simple and straightforward |
| Portability | Lightweight and easy to transport if necessary |
| Stability | Firm and secure, even in windy conditions |
By carefully considering these aspects, you can ensure that your solar still frame provides the necessary stability and support for optimal water collection. With the frame assembled, it is now time to move on to the next step: creating the collection basin.
Transition: Now that the solar still frame is securely in place, let’s proceed to the next crucial step: creating the collection basin.
Creating the Collection Basin
When creating the collection basin for a DIY solar still, it is important to consider the material options available. The basin can be made from various materials such as plastic, stainless steel, or glass, each with their own advantages and disadvantages in terms of durability, heat retention, and cost.
Additionally, an efficient drainage system must be implemented to ensure proper water collection and prevent any leakage or overflow.
Basin Material Options
Different materials can be used to create the collection basin for a DIY solar still. When choosing a material, there are several factors to consider, including durability, cost, and environmental impact. Here are three options to consider:
-
Stainless Steel Basins:
- Pros: Stainless steel is highly durable and resistant to corrosion, ensuring a long lifespan for the basin. It is also easy to clean and maintain.
- Cons: Stainless steel basins tend to be more expensive than other options, and they can be heavy and difficult to transport.
-
Plastic Basins:
- Pros: Plastic basins are lightweight, affordable, and easy to find. They are also resistant to corrosion and can be molded into different shapes and sizes.
- Cons: Plastic has a negative environmental impact due to its non-biodegradable nature and potential for leaching harmful chemicals into the water.
-
Other Materials:
- Other materials such as glass or ceramic can also be used for the basin, but they may have limitations in terms of durability, cost, or availability.
Considering these options, the basin material should be chosen based on the specific needs and priorities of the DIY solar still project.
In the next section, we will discuss the importance of an efficient drainage system for the solar still.
Efficient Drainage System
To ensure optimal water collection, the construction of a DIY solar still requires the implementation of an efficient drainage system within the collection basin. The drainage system plays a crucial role in maintaining the functionality and effectiveness of the solar still.
It is responsible for directing the condensed water towards the collection point, while preventing any potential blockages or obstructions that may hinder the water flow. Regular drainage system maintenance is essential to optimize water flow and ensure continuous water collection.
This involves inspecting and cleaning the drainage channels, removing any debris, and ensuring that the system is free from any clogs or leaks. By maintaining an efficient drainage system, water flow within the DIY solar still can be maximized, resulting in increased water collection efficiency.
Constructing the Evaporation Surface
When constructing the evaporation surface for a DIY solar still, there are several material options to consider. The choice of material will impact the efficiency of the still and the quality of the collected water.
Additionally, it is important to take into account efficient design considerations such as maximizing surface area and ensuring proper insulation to optimize the evaporation process.
Material Options for Surface
One effective option for constructing the evaporation surface of a DIY solar still is using a high-quality glass or plastic material. These materials provide a smooth and non-porous surface that allows for efficient evaporation and condensation of water.
However, there are alternative options that can be considered, especially for those looking for more cost-effective choices. Here are three such options:
-
Aluminum foil: Aluminum foil is a widely available and affordable material that can be used as an alternative to glass or plastic. It is lightweight, easy to work with, and can provide a reflective surface that helps in trapping heat.
-
Polycarbonate sheets: Polycarbonate sheets are a durable and cost-effective choice for constructing the evaporation surface. They are lightweight, shatterproof, and resistant to UV radiation, making them suitable for outdoor use.
-
Acrylic sheets: Acrylic sheets are another viable option for the evaporation surface. They are transparent, lightweight, and offer good heat retention properties. Additionally, acrylic is more resistant to impact than glass, making it a safer alternative.
Efficient Design Considerations
The efficient design consideration for constructing the evaporation surface of a DIY solar still is maximizing heat retention through the use of appropriate materials.
To achieve maximum efficiency in water evaporation, it is crucial to optimize heat transfer within the system. The choice of materials for the evaporation surface plays a vital role in this process.
Ideally, the selected material should have high thermal conductivity to facilitate efficient heat transfer from the sun to the water. Additionally, it should possess excellent heat retention properties, minimizing heat loss to the surroundings.
Materials such as dark-colored metals or glass can be effective options, as they absorb solar radiation effectively and retain heat for prolonged periods.
Maintaining and Using the Solar Still
How can the solar still be properly maintained and utilized for water collection? Here are some useful tips and troubleshooting tips to ensure the efficient operation of your DIY solar still:
-
Regular cleaning: To maintain optimal performance, it is important to clean the solar still regularly. Remove any debris or dirt that may have accumulated on the surface of the still, as this can obstruct the sunlight and reduce its efficiency.
-
Proper positioning: Ensure that the solar still is placed in a location that receives direct sunlight for most of the day. This will maximize the amount of heat absorbed and increase the rate of water evaporation.
-
Monitoring water levels: Keep an eye on the water levels inside the still. If the water level drops too low, it can lead to overheating and damage the still. Conversely, if the water level is too high, it can impede the evaporation process. Maintain an optimum water level for efficient water collection.
Frequently Asked Questions
How Long Does It Take for the Solar Still to Produce Drinkable Water?
The time it takes for a solar still to produce drinkable water varies depending on factors such as sunlight intensity, temperature, and humidity. Optimizing the design and using advanced materials can increase the efficiency and speed up the water production process.
Can the Solar Still Be Used to Collect Water in All Types of Weather?
The effectiveness of a solar still for water collection varies in different climates. While it can be used in various weather conditions, extreme weather may pose limitations and affect its efficiency.
Is It Necessary to Use Specific Types of Materials for Constructing the Evaporation Surface?
Using specific materials for constructing the evaporation surface in a DIY solar still is necessary to ensure optimal performance. Alternative materials may not provide the same benefits, such as efficient evaporation and condensation processes, leading to lower water collection rates.
How Often Should the Collection Basin Be Cleaned?
To maintain optimal water collection in a solar still, it is important to regularly clean the collection basin. This ensures that any debris or contaminants are removed, ensuring the safety of the collected water for consumption without filtration.
Can the Solar Still Be Used to Desalinate Saltwater?
The solar still can be used to desalinate saltwater, although its efficiency may vary depending on factors such as sunlight intensity and the design of the still. Additionally, the solar still has alternative uses beyond water collection.
Conclusion
In conclusion, constructing a DIY solar still for water collection is a practical and efficient solution in areas with limited access to clean water sources. By following the outlined steps and using the required materials, individuals can create a sustainable water supply.
For example, a hypothetical case study in a remote desert region could showcase how a DIY solar still provides a reliable source of clean water, ensuring the survival and well-being of the local community.